A while ago I created my first REST service in webMethods Integration Server. It’s quite easy to do and works correctly out of the box. Software AG managed to implement the standards quite well and I didn’t have to go through hours of configuring (like I had to with SOAP webservices).
How to create a REST service in webMethods Integration Server
First of all, you don’t actually create a REST service, but a REST resource. A resource represents a business entity for wich you can call the basic CRUD operations through (multiple) services, that respond to the common HTTP methods (GET, POST, PUT, DELETE). So, a REST resource uses multiple Flow services that implement the logic. These services get called automatically by IS, when the corresponding HTTP call is made by the client.
My example implements a common scenario: Authenticating a user based on its username and password.
The first – and most important – question was, how to name the REST resource. I couldn’t name it User, as one might think at first, because this name doesn’t fit the notion of REST: I don’t create or read a user. The user already has to be there and simply gets authenticated. In a SOAP context I would create a Flow service like AuthenticateUser with Username and Password as parameters. But in REST we can only use the basic CRUD operations. And there is no HTTP method called AUTHENTICATE. So I had to find another name for the resource.
What I ended up with was the concept of a Session. When a user gets authenticated, a Session is created for him. When he logs off, the Session gets destroyed. I can also read the Session to find out, whether the user is already logged in. So it all seemed to make sense now.
After the nomenclature problem is solved, here’s a quick step-by-step guide on how I implemented the REST resource in IS.
Step-by-step guide
- Create a Flow service that implements the logic you need.
In my case, I createdAuthenticateUseras described above (see Best practices for structuring packages in webMethods Integration Server for details on the package’s folder structure).

As the REST resource is merely an additional access layer on top of existing logic (like a Web Service Descriptor), it’s good practice to keep the two concerns – business logic and access logic – separated. Another advantage of this approach is the fact, that you can simply re-use your existing Flow services and only have to add the REST part on top of it. - Make sure the Flow service works as expected.
This step might seem obvious, but if you introduce another layer of complexity in your system, you better make sure the underlying parts already work correctly. Otherwise, the search for potential errors might take very long and you can’t be sure, if it’s really the REST part that goes wrong.
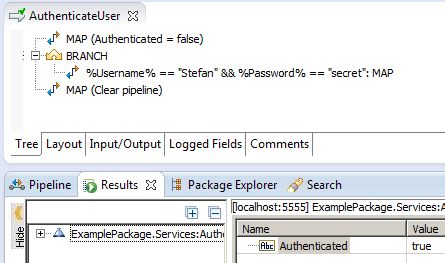
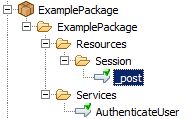
- Create a REST Resource.
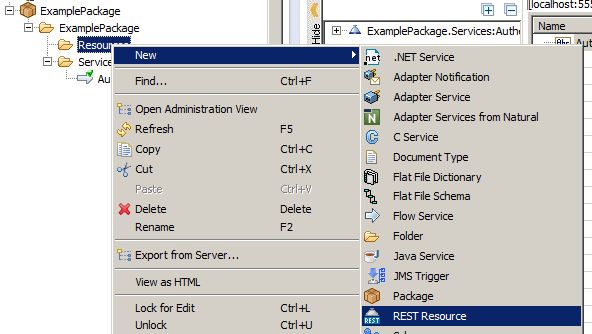
This is a easy as selectingNew->REST Resourcefrom Designer’s context menu, giving the resource a name and selecting the needed HTTP methods.
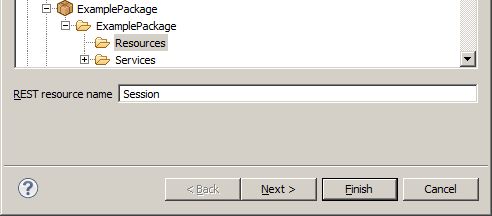
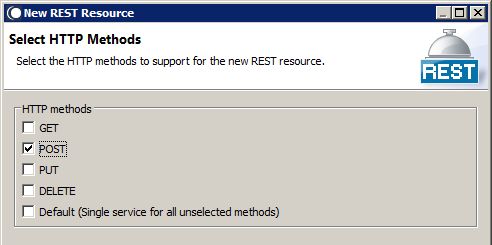
Here, I usedPOST, because I want to create a new user session. If you are not exactly sure, which HTTP methods to use, here’s a quick mapping:GET-> read,POST-> create,PUT-> update,DELETE-> delete. Also see Using HTTP Methods for RESTful Services and When should we use PUT and when should we use POST?.
Voilá, we created our first “REST Service”! 🙂
- Define the parameters for the REST services.
The newly created service_posthas no parameters yet (aside from two technical parameters$resourceIDand$path, see REST Developer’s Guide for an explanation of those). So you need to add them.
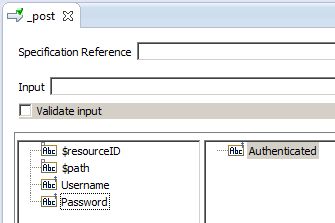
In my case, I simply used the same parameters fromAuthenticateUser. But they also can be different. - Implement the REST service.
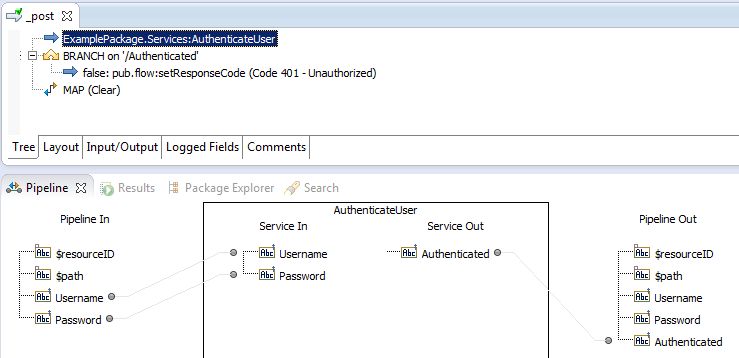
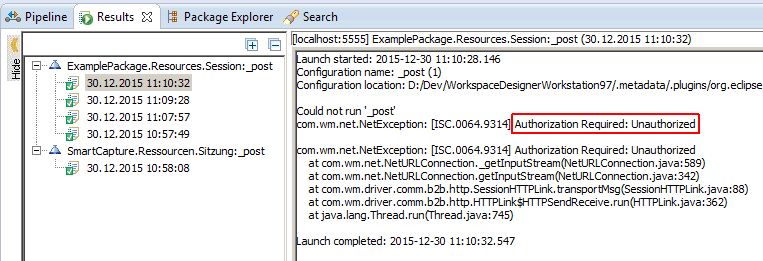
Implementing the_postservice is quite simple, because the main logic is already implemented inAuthenticateUser. Therefore,_postcan simply callAuthenticateUserand only needs to take care of REST specialties, like setting a meaningful response code. Otherwise, IS returns200(see List of HTTP status codes for additional information) even if the authentication was not successful. Fortunately, there is an HTTP code that describes almost exactly what I need:401 Unauthorized. You can set the response code with the IS servicepub.flow:setResponseCode.
- Test the REST service.
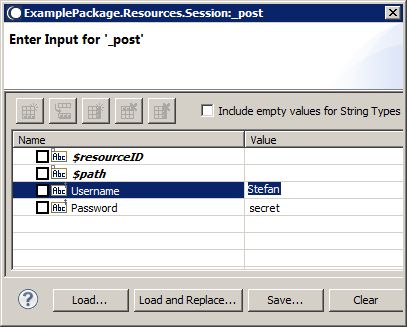
You can now call the_postservice directly from Designer and make sure it works.

-
Test the REST service from outside IS.
After you made sure, that the_postservice works as expected, you can try and call it from outside IS. My tool of choice for this task iscurl(which comes with the installation of Git for Windows, by the way). All REST resources are available in IS under the following URL without any further configuration:http://server:port/rest/FullyQualifiedResourceOr translated to my example:
http://localhost:5555/rest/ExamplePackage/Resources/SessionYou can call the REST service with this
curlcommand on Windows (on Linux you need to replace^with\, see Windows: How to specify multiline command on command prompt?):curl^ -u Administrator:manage^ -X POST^ -H "Accept: application/json"^ -H "Content-Type: application/json"^ -d "{\"Username\":\"Stefan\",\"Password\":\"secret\"}"^ http://localhost:5555/rest/ExamplePackage/Resources/SessionIS automatically unwraps the JSON payload and converts it to IS documents. You only need to provide the same document structure and field names as defined in your
_postparameters.
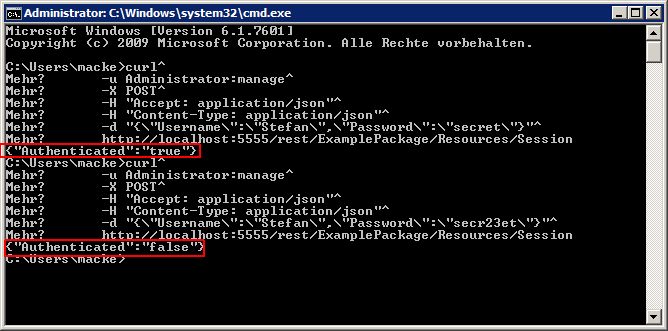
By the way: I had to use double quotes for the JSON payload and needed to escape the quotes inside the JSON data to make it work on Windows. When I used single quotes (e.g.-d '{"Username":"Stefan","Password":"secret"}'), I got this nice error:org.codehaus.jackson.JsonParseException:Unexpected character (''' (code 39)): expected a valid value (number, String, array, object, 'true', 'false' or 'null')\n at [Source: com.wm.net.HttpInputStream@74356f93; line: 1, column: 2]
And this leaves you with a fully functional REST service in webMethods Integration Server! 🙂
Official Documentation
These documents helped me along the way:
- REST Developer’s Guide
- Integration Server Built-In Services Reference
- Web Services Developer’s Guide
- Integration Server Administrator’s Guide
Recommended reading
For a very good introduction to REST I recommend the Pluralsight course REST Fundamentals:
 REST Fundamentals – $29.00 REST is an overloaded, and thus misunderstood term in architectural circles these days. This course attempts to clear up some of the misunderstandings about REST as well as provide a more practical approach for designing RESTful solutions – both clients and services. Additionally, the course looks at REST from the perspective of the cloud and describes how REST is well-suited to meet the demands that the cloud brings to bear on a modern architecture. |
Very Nice post…. step by step guide Appreciate it.
Thanks for the feedback! I’m glad I could help.
nice ..:)
nice exp..:)
Its really very good post..you have explained step by step. Please post some more, if you have any, its really helpful us to upgrade knowledge on new topics.
Hi Rajesh, thanks for your feedback. I’ll do my best 😉
Best regards, Stefan
Very helpful post. Thank you…
Thanks !! Nice explanation !!
Its really good post explaining step-by-step.
If you explain about different methods usage of Rest,it would be helpful to learn about Restful webservices.
Hi Stefen,
Thanks for your clear explanation, I have followed the same steps which you have given but am getting below error after run the _post service. Please look into this error and let me know where I was wrong.
Launch started: 2016-09-09 11:49:42.21
Configuration name: _post
Configuration location: E:/SoftwareAG/workspace95/.metadata/.plugins/org.eclipse.debug.core/.launches/_post.launch
Could not run ‘_post’
com.wm.lang.flow.FlowException: [ISC.0049.9009] Missing required property switch at ‘unlabeled BRANCH’
com.wm.lang.flow.FlowException:[ISC.0049.9009] Missing required property switch at ‘unlabeled BRANCH’
Launch completed: 2016-09-09 11:49:52.835
Nice ….
Hi Sainath,
it looks as if you miss a label in a branch. Could you perhaps step through the service with the debugger to find out at which position in your Flow service the error occurs?
Best regards,
Stefan
Hi Stefan
Do you know how we would implement rest service with more than one resource identifier? So we can call like this: http://MyHost:5555/rest/purchasing/order/75909/customer/0122
Hi Alfred,
you can call your REST service with any path without configuring anything. The information behind
orderwill be available in the variables$resourceID(75909) and$path(customer/0122) inside your service.Best regards,
Stefan
Hi Stefan,
Do you have any idea on how do we implement REST over _post method with XML as the request? I am unable to trace in pipeline as it gives log as below.
0 node {com.wm.lang.xml.Document} = ‘DOCUMENT System ID: null Public ID: null’
Hi Rashmi,
unfortunately, I have only used REST with JSON so far. So I can’t help you :-/
Best regards,
Stefan
Hi Stefan
Can you please provide the same examples for get and put and btw for post restful service how will the authentication happen if we are invoking it from outside.
I have tried running with the ACL as anonymous and it went through but in real scenario how will this work
Hello Stephen,
When I run the post service it is working fine but when i try to run it from the browser, i get HTTP 405 Method Not Allowed.
http://localhost:5555/rest/ExamplePackage/Resources/Session
Please let me know what i am missing.
Thanks
-Vijay
Hi Vijay,
are you running the service directly from within your browser via a GET request? If you only provide a POST method, a GET will produce a 405 error. You might want to take a look at Postman for testing purposes.
Best regards,
Stefan
Hi abhihith,
authentication will work exactly as with a SOAP webservice. You can provice Basic Authentication with your request to the REST service, e.g. via the
Authorizationheader (e.g.Authorization: Basic QWxhZGRpbjpvcGVuIHNlc2FtZQ==). I’ve used the same configuration with ACLs in Integration Server as with SOAP services.Best regards, Stefan
Hello,
Thanks for the guide but one thing I am having trouble understanding is this line: “IS automatically unwraps the JSON payload and converts it to IS documents”.
In your example it looks like the input to your flow service is 4 strings. Did you also add a document to your input and mirrors the structure in or message body? Did you use a jsonStream and then utilize a public json service to convert that to a document? Or did you handle this some other way?
Thank you!
Hi Stefan,
you are an oasis in the dessert of mediocre documentation from the software ag. Thanks for the well written article.
Best regards
Martin
Hi Martin, thanks for the feedback 🙂
Hi Chris, no I didn’t add anything. The input parameters are exactly like they are shown in the example. You just need to create a JSON document in your caller and pass it to the service. If the names of these fields match the input fields, you’re done. See the example above: if the input parameter is “MyString”, you need to provide a JSON document
{ "MyString": "My value" }.Hi Stefan,
Can you please post similar post with step by step guide to create HTTPS Rest services?
Hi Marimuthu,
the steps are the same. And here’s a guide for the HTTPS part: How to import SSL certificates into webMethods Integration Server.
Best regards,
Stefan
Hi Stefan,
Very good tutorial. Thank you.
I was wondering if there is a way to access the REST request before the REST method takes over.
The equivalent of SOAP Request Handler for the Web Services world.
The idea is that the REST client can send a user creation call for example like:
{userId:”1″, username:”john”}
OR
{user: {userId:”1″, username:”john”}}
In the first case IS will map this to 2 input strings
In the second case IS will map the input to a document.
Second case is better because you can create doc types and easily manage the interface, especially if you have cases where you have just one REST method (_post) and multiple resources and you need to parse the $path variable.
Thanks.
Vlad.
Hi Vlad,
I think I would create two endpoints for the use case you described. Why should one endpoint be able to work with two different sets of input values?
Best regards,
Stefan
very good explanation, really appreciate.
Hi, for your forced 401 – Unauthorized error, did you encounter a “temporary disconnection” from your server? Every time I set 5xx HTTP status codes and some 4xx ones, I get the same message (com.wm.net.netexception) and a prompt that I got disconnected from the server (I didn’t).
More details here.
It’s a bit misleading and annoying especially when debugging.
Hi Aly, no I haven’t seen this behaviour before. I’m sorry I can’t help you…
Hi Stefan,
Can you please tell how can we access an HTTPS REST service?
Thanks & Regards,
Swati
Hi Swati,
what exactly do you need to know? You access an HTTPS service exactly like an HTTP service.
Best regards,
Stefan
Hi Stefan,
For HTTPS request, certificate and key will be provided by the client. How can it be used to send across an HTTPS request?
Thanks & Regards.
Swati
Hi Stefan,
I have a scenario here. Could you tell me how to achieve this.
Need to publish JSON data to Google Cloud pub/sub through cloudStream adapter.
Could you tell me the steps and components involved to complete this.
Thanks,
Karthika
Hi Karthika, sorry, I have absolutely no experience with CloudStream :-/
Hi Stefan,
Thank you for your elegant example.
Would it be possible to add to it an example of how to invoke it from a consumer web service running in another (or same) webMethods IS?
Kind regards,
Nigel
Hi Nigel, just to see if I understood you correctly: You would like to see how to call a REST service from IS?
Hi Stefan,
One way would be to use pub.client.http can call a REST service, was wondering if there is an elegant way to analyze the response code, message, body.
Thank you,
Nigel
Hi Nigel, yes, that’s exactly how I do it. Unfortunately, that’s not very elegant :-/ You need a few Flow steps and redundant service definitions. Another way would be to use the Application Platform in IS which makes developing Java services much easier, but I haven’t tried that, yet.
Thank you sir !
Nigel
Stefan,
Is there a way to get the entire POST payload as is in the service.
Hi TC, sorry, I don’t know that.