After publishing a REST Resource in webMethods Integration Server and giving it a nice logical URL, you may want to call the service from a Java program. Here’s how to do this using the Jersey framework.
Automatically testing a REST Resource
On top of my unit tests for plain old Flow services (as introduced in Unit-testing Flow Services in webMethods’ Integration Server with JUnit and released in Test everything! – Lessons Learned from SOA-fying a Monolith) I need to automatically test my REST Resources as well, of course. For this reason, I took a closer look at the Jersey Java framework, which provides an easy way of calling REST services.
With Jersey, a complete integration test for a REST Resource looks like this (file CreateSessionShould.java):
package net.aokv.is.examplepackage.resources.session;

import static org.hamcrest.CoreMatchers.is;
import static org.junit.Assert.assertThat;

import javax.ws.rs.client.Client;
import javax.ws.rs.client.ClientBuilder;
import javax.ws.rs.client.Entity;
import javax.ws.rs.client.Invocation.Builder;
import javax.ws.rs.client.WebTarget;
import javax.ws.rs.core.MediaType;
import javax.ws.rs.core.Response;
import javax.xml.bind.annotation.XmlRootElement;

import org.glassfish.jersey.client.authentication.HttpAuthenticationFeature;
import org.junit.Before;
import org.junit.Test;

public class CreateSessionShould
{
    private Client client;
    private WebTarget webTarget;

    @XmlRootElement
    private static class InputParameters
    {
        public String Username;
        public String Password;
    }

    @XmlRootElement
    private static class OutputParameters
    {
        public boolean Authenticated;
    }

    @Before
    public void setup()
    {
        HttpAuthenticationFeature feature = HttpAuthenticationFeature.basic(
                "Administrator",
                "manage");

        client = ClientBuilder.newClient();
        client.register(feature);

        webTarget = client.target("http://localhost:5555/User");
    }

    private Builder createRequest()
    {
        return webTarget
                .path("/Session")
                .request(MediaType.APPLICATION_JSON);
    }

    private void shouldBeAuthenticated(Response response) throws Exception
    {
        assertThat(response.getStatus(), is(200));

        OutputParameters output = response.readEntity(OutputParameters.class);
        assertThat(output.Authenticated, is(true));
    }

    private void shouldNotBeAuthenticated(Response response) throws Exception
    {
        assertThat(response.getStatus(), is(401));

        OutputParameters output = response.readEntity(OutputParameters.class);
        assertThat(output.Authenticated, is(false));
    }

    @Test
    public void authenticateExistingUserWithCorrectPassword() throws Exception
    {
        InputParameters input = new InputParameters();
        input.Username = "Stefan";
        input.Password = "secret";

        Response response = createRequest()
                .post(Entity.entity(input, MediaType.APPLICATION_JSON));
        shouldBeAuthenticated(response);
    }

    @Test
    public void notAuthenticateExistingUserWithWrongPassword() throws Exception
    {
        InputParameters input = new InputParameters();
        input.Username = "Stefan";
        input.Password = "asdf";

        Response response = createRequest()
                .post(Entity.entity(input, MediaType.APPLICATION_JSON));
        shouldNotBeAuthenticated(response);
    }

    @Test
    public void notAuthenticateNotExistingUser() throws Exception
    {
        InputParameters input = new InputParameters();
        input.Username = "unknown";
        input.Password = "asdf";

        Response response = createRequest()
                .post(Entity.entity(input, MediaType.APPLICATION_JSON));
        shouldNotBeAuthenticated(response);
    }
}
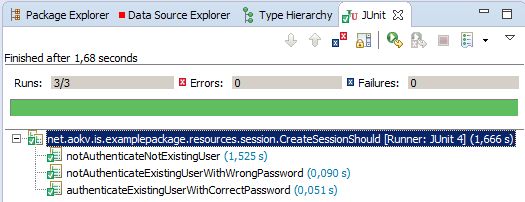
You can simply run the test with JUnit:

How it works
Jersey provides means to simply call a REST service and convert the input and output parameters to and from POJOs. All you need to do is annotate the corresponding classes (InputParameters and OutputParameters in the example above) with @XmlRootElement. Even though JSON is used for data exchange, the underlying library needs this JAXB annotation to work properly. Everyhing else is handled for you by Jersey and some reflection magic.
The example uses Basic Authentication for the REST service (or in other words: username and password). And HttpAuthenticationFeature provides the means to use Basic Authentication. It’s added to the Client that calls our service.
HttpAuthenticationFeature feature = HttpAuthenticationFeature.basic(
    "Administrator",
    "manage");
This line of code builds the REST service’s URL. You can see how the URL is put together and JSON is used for transferring the payload to the service.
client.target("http://localhost:5555/User")
    .path("/Session")
    .request(MediaType.APPLICATION_JSON);
The response we get from the service contains the HTTP status code and the JSON payload, that is automatically converted to a POJO:
assertThat(response.getStatus(), is(200));
OutputParameters output = response.readEntity(OutputParameters.class);
assertThat(output.Authenticated, is(true));
Calling the service then is as easy as creating the input POJO and POSTing the payload as JSON:
InputParameters input = new InputParameters();
input.Username = "Stefan";
input.Password = "secret";

Response response = createRequest()
    .post(Entity.entity(input, MediaType.APPLICATION_JSON));
Recommended reading
I took a very good introductory course on REST with Jersey on Pluralsight: RESTFul Services in Java using Jersey. It goes into all the details needed to provide as well as consume REST services with Java. I would definitely recommend this course, if you want to get a deeper understanding of the code above.
 RESTFul Services in Java using Jersey – $29.00 This course walks through developing RESTFul web services in Java using the Jersey Framework. It walks through all the configuration and setup to begin developing using this framework. |